
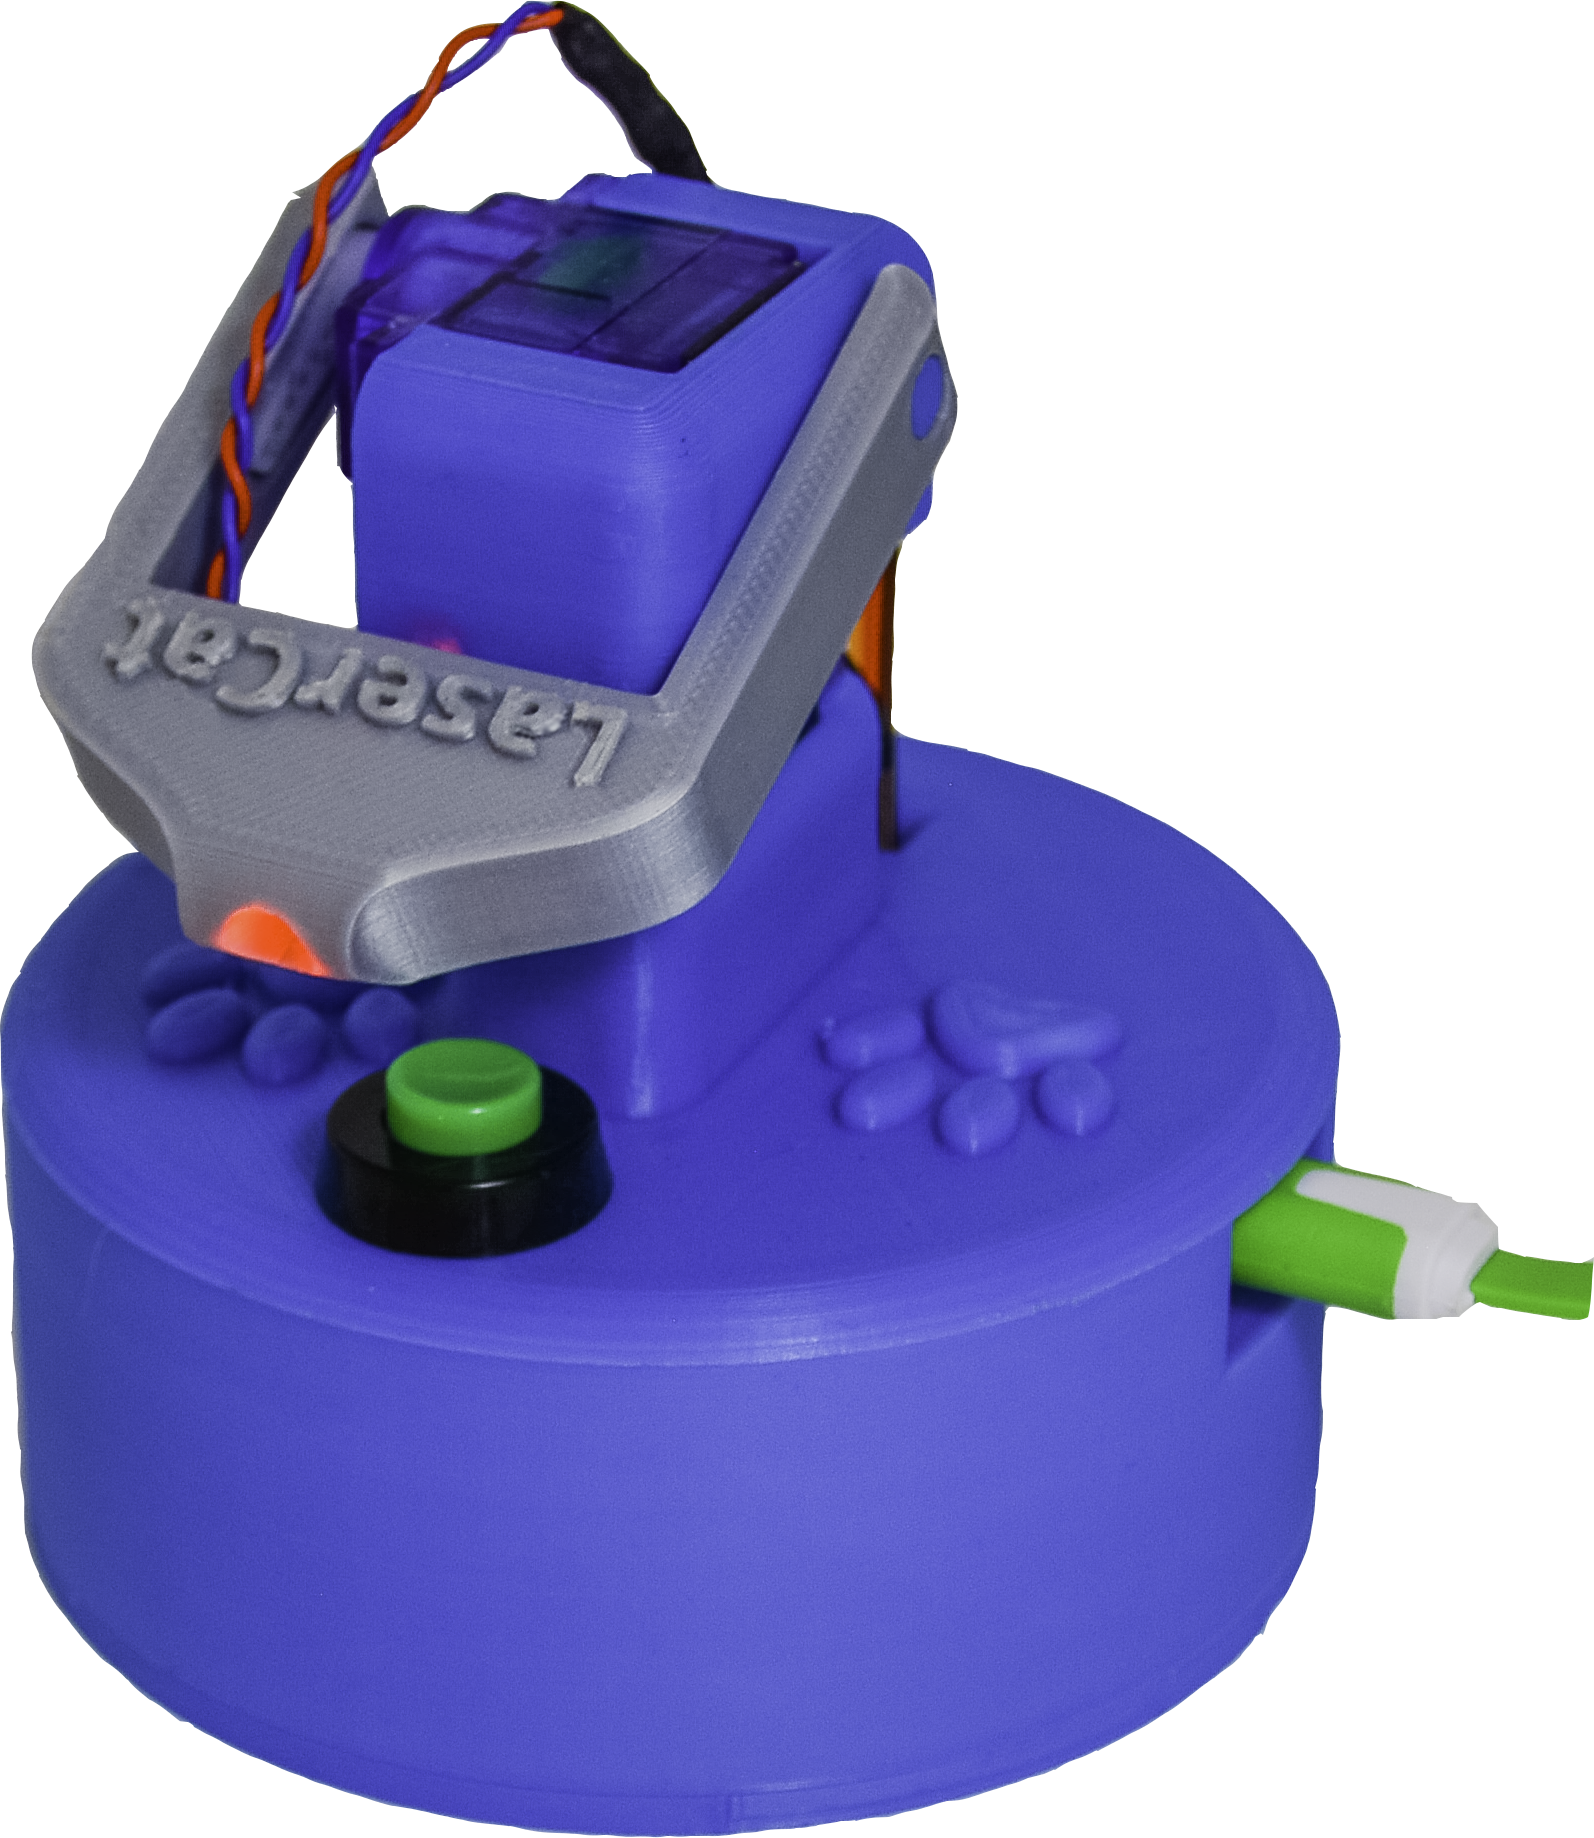
How does it work
A laser pointer mounts on a pan/tilt mechanism, and custom firmware lets you drive movements via MQTT or OSC protocols for integration with smart systems or controllers. The electronics sit in a 3D‑printed housing, and you can tweak code to change motion patterns, connect to Home Assistant, or add manual control.
- You send commands.
- The servos move.
- The laser dances.
- The cat loses its mind.
Supplies
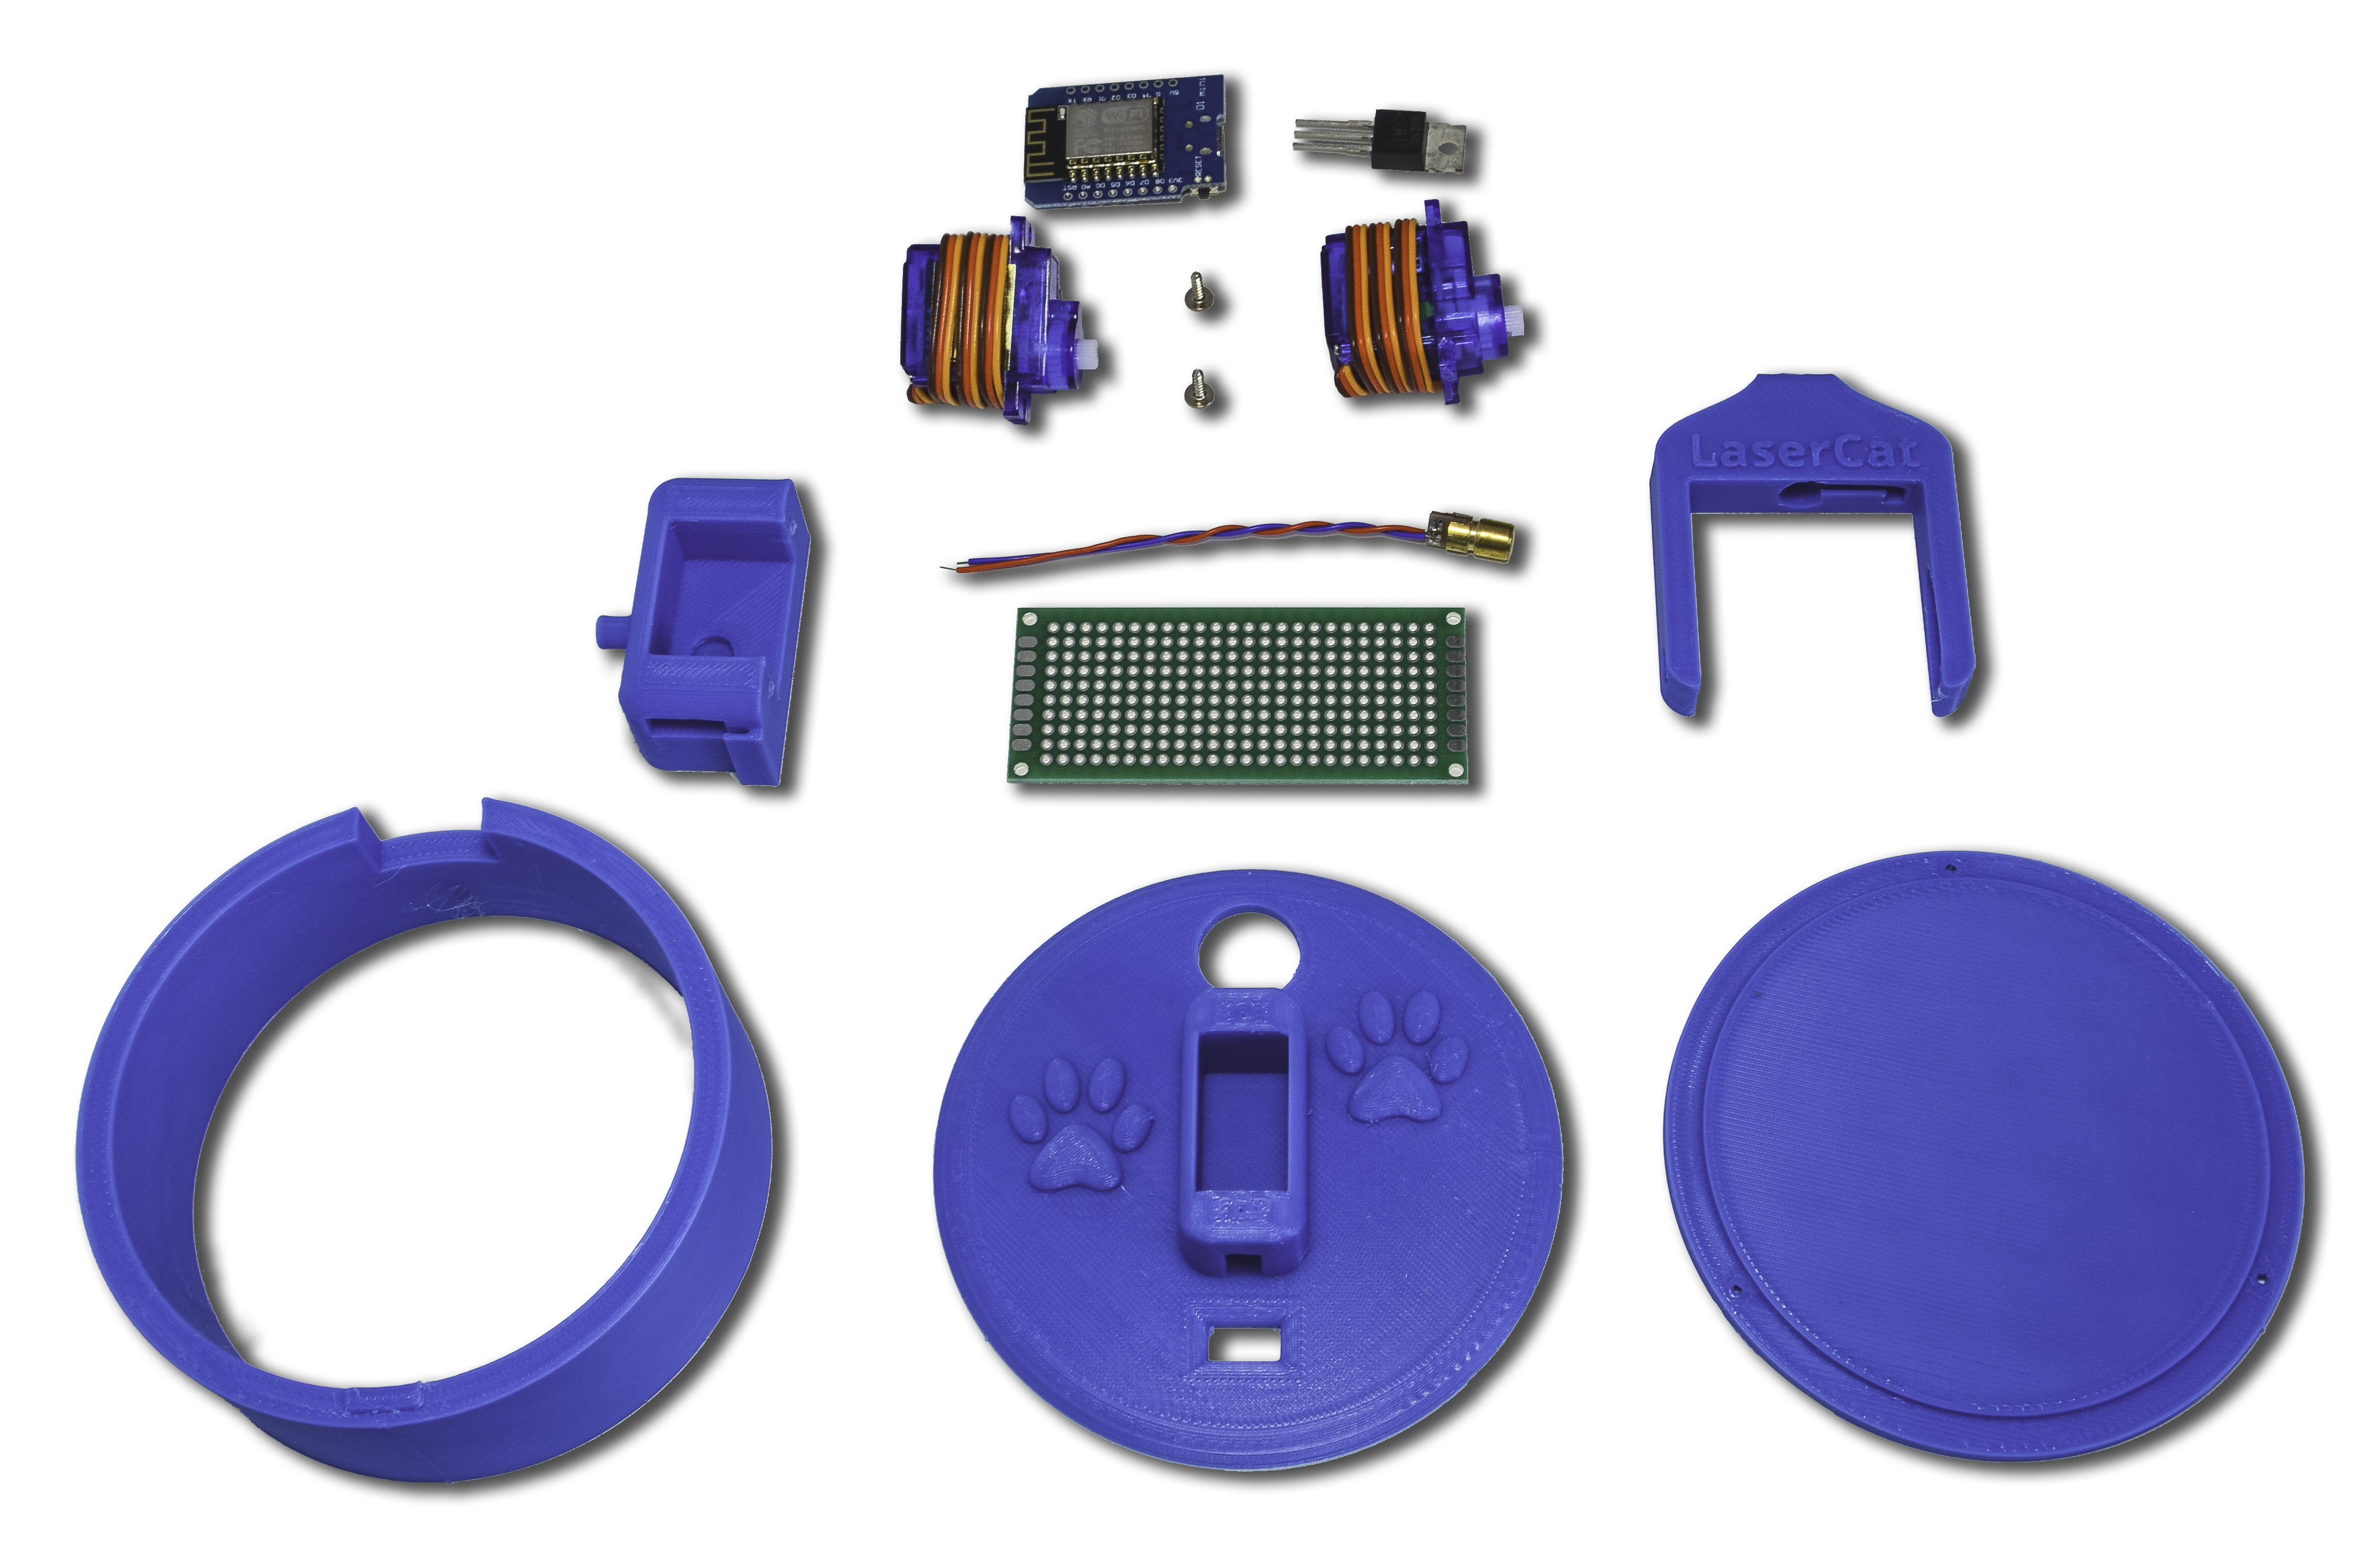
This is all you need:
- 1 x Wemos D1 Mini: I just use a Wemos D1 mini, but any ESP based board, like a nodeMCU 1.0 will do as well.
- 1 x Laser pointer: Just get the basic bare-bones laser, nothing fancy about it.
- 1 x Power Transistor: I had a few BUZ100 around, but really any power transistor will do. We just can't power the laser straight from the ESP board, so we need some power help there.
- 1 x Prototype PCB (30x70mm): Just keep it all organized on a nice and clean board like this.
- 1 x Push button: In case you want to turn it on with a simple button, here is the one I used.
- 2 x Servo 9g: These are the smaller sized and cheap servos... not the best in the market, but your cat won't really notice the difference.
- 3D printer or a friend with one: Well, yeah, your cat won't care if there is a nice case to hold it all together or not, so I guess you could just glue it all, but how are you gonna show off when your friends come over then?
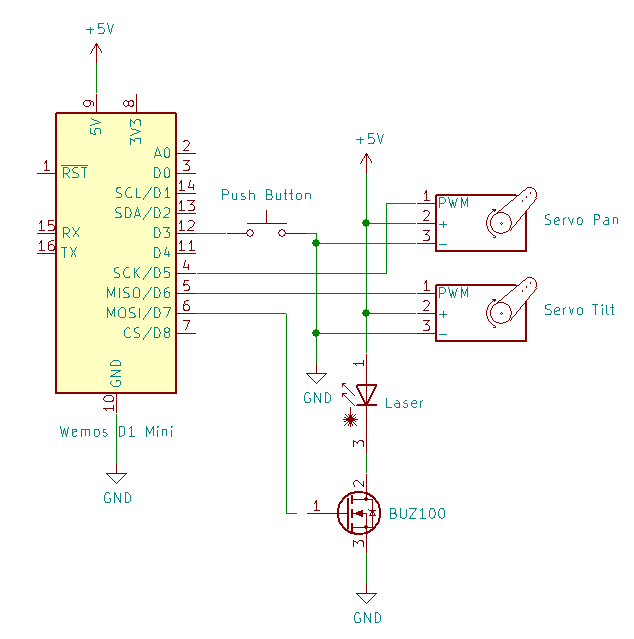
Electronics
The circuit here is pretty simple, so there is no need to use fancy connectors or even a board, but it helps keeping it clean and organized.
I threw in some Molex connectors to make look nice and a bit more reusable.
Download the Schematic here.
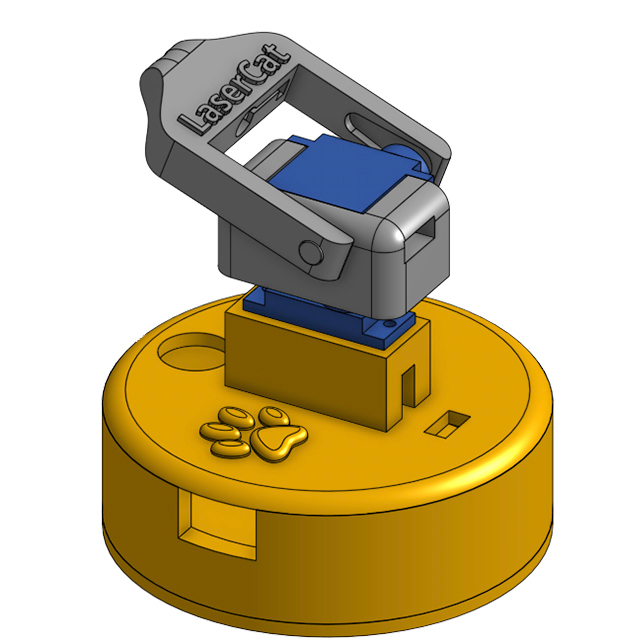
Body
You need a 3D printer for this step, or maybe a friend with one... or if you live nearby, text me and I'll exchange parts for beer :)
The print is pretty straight forward, so not much to say about it, but in case you want to modify my design, you can just do so on this link, or just go and download all the STLs here.
Firmware
The software is a bit messy at the moment (<-- This was written in 2020, so chances are it may stay this way for a bit longer)
Check out the code on GitHub
You can control your LaserCat in two ways. I happen to use both. If you don't, you may have to tweak the code a bit to make sure it doesn't run into connection loops.
- MQTT: LaserCat will connect to the MQTT broker declared in the config.json file. This will let you integrate it with you home automation system, for example. In my case I use Home Assistant; more on that part of the configuration later.
- OSC: I know this is less common, but if you are into music, life events, theater or professional lighting, you know how cool this can be. I'll explain more about this later, but long story short, OSC is a communications protocol commonly used in mixing boards and other devices to control lights, cameras, motors, speakers... anything to be on a stage really.
Make sure you tweak the config.json file as needed in order to get your LaserCat to connect to the proper services... starting with renaming it as config.json instead of config.json.example.
Control Panels
You could controlyour LaserCat in pretty much anyway through the two protocols described in the Firmware section, but here are my two favorite ways: OSC and Home Assistant
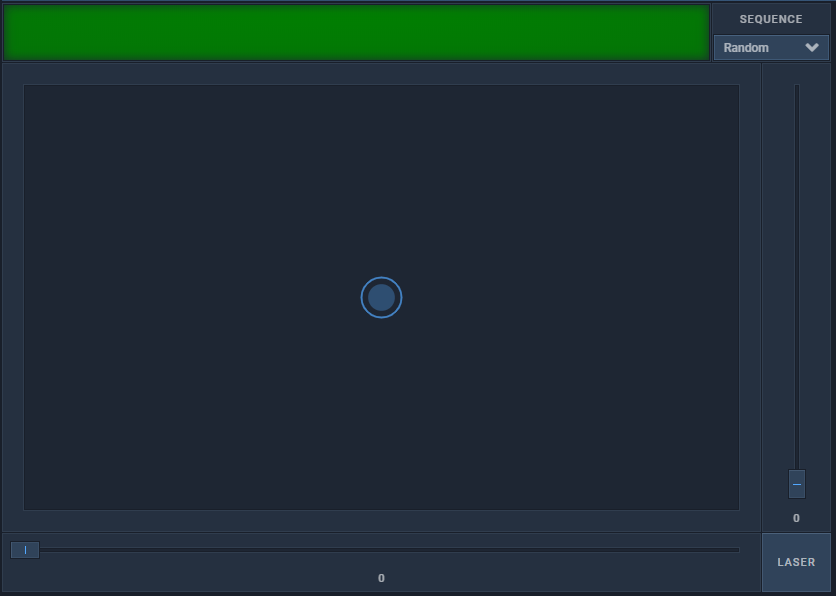
1. OSC
If you don't know about OSC (Open Sound Control), you should check it out and definitely check out the implementation of this open source controller called Open Stage Control.
I've designed a simple control panel with OSC which takes care of a couple things:
- Control Interface: You can use the virtual joystick or the sliders to control the Pan and Tilt of your LaserCat. Code here.
- Keep Alive Responder: This is a simple js script (laserCat-keepalive-responder.js) to respond to the keep alive signals sent by your LaserCat. Code here.
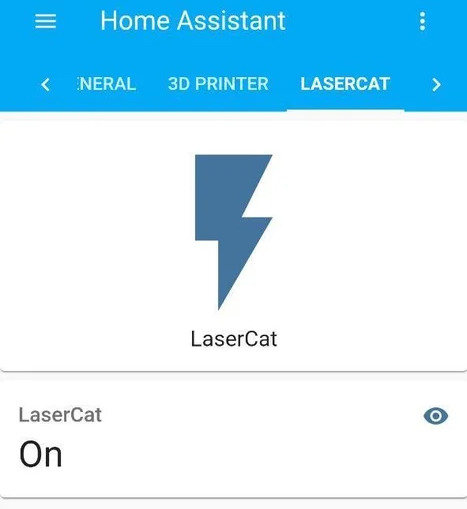
2. Home Assistant
For this step I'm going to assume you already have and are familiar with Home Assistant; if not, you should check it out!
In case you don't have it installed already, you will need an MQTT broker. I'd highly advise using the Mosquitto Addon.
Now you can add a new switch to your configuration.yaml:
  - platform: mqtt
    name: "LaserCat"
    command_topic: "sq"
    payload_off: "0"
    payload_on: "2"<br>
Note how I'm using payload_on: "2"
This is just because 2 is the Sequence ID I want to trigger, which happens to be a random movement at random and somehow slow speeds with the laser on.
Want to talk about LaserCat?
Curious to bring LaserCat to life for your own furry friends? Whether you want to build one, tweak the code, or just learn more about how it works, I’d love to chat and talk about your ideas!
Reach out and let’s make your pet’s playtime smarter—and a lot more fun!


